Network-Manager installation
The Network-Manager is installed by default when you install ubuntu. To check whether the Network-Manager is installed on you machine, open the terminal with Ctrl+Alt+T and tap the command below:
nmcli --version
If you got a version, the manager is already installed.If not, tap the command below:
sudo apt-get install network-manager
Usage
Network-Manager has the GUI and command to config. For the nmcli command not introduced in this article, we only use the GUI.
To open the network-manager GUI, click the up/down arrow on the upper right corner.
Ifupdown(enp0s25): up the interface(enp0s25), which defines in /etc/networking/interfaces.Disconnect: disconnect network you are using.Enable Networking: allow your machine to connect to internet.Connection Information: list the info of your network.Edit Connections...: manage your config.
you probable see another option named Enable Wireless if you machine has a wireless network adapter like laptop.
Config PPPoE
Click
Edit Connections...to configure.Click
Addto add a new config.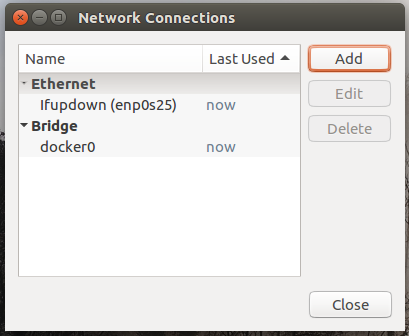
Select
DSLand clickCreate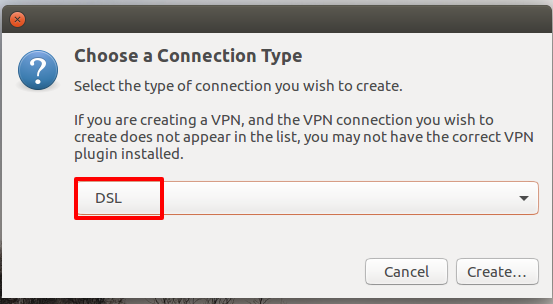
Modify the connection name.
Fill in the username and password.
ClickSave
Back to menu and select the name you just filled in.For me, it's
PPPoE.
Verification
Get the IP.
open the terminal with
Ctrl+Alt+Tand tap the command below:$ ifconfigyou will see a interface named
ppp0.
Check ip route
$ ip route
default dev ppp0 scope link
Resolve domain
$ nslookup DOMAINVisit website.